It was 1 in the morning on a cold night in Minnesota. The temperature was 20 below zero and the wind chill felt like 35 below zero. I was on a shoot to capture the lights of Christmas that illuminated the entire city before they shut off at 3am. I was shooting slide film that night with speeds of 100 and 50 to give myself a shutter speed that would allow me to shoot 15 seconds or more. I carried a Minolta Maxxum 7 and my old trusty Canon AE1 and was ready to shoot.
Now when I shoot, weather doesn’t bother me one bit. The biggest problem that I had that night was my Maxxum 7 froze up, so the rest of the night I was gloveless while I adjusted the aperture and shutter to a setting that would allow me to push the light to an effect that would not let light bleed into the shadows. Once the light stops, there is no gradation between lightness and darkness. I knew with the settings I was using and the amount I was bracketing that I would in fact get an interesting outcome.
When I got the slides back I was in for a surprise. With the amount of light that was let in from the shutter and the fact that I kept the aperture anywhere from 22 to 27, I found that not only did the light source from artificial environmental sources (street lights) but the detail in the snow was incredible. The great thing about experimenting with your camera, different settings, film speeds, and even bracketing your light is that you will not only figure out what your hypothesis was, but you are sure to find out other benefits from changing the way conventional shooting is done.
With the Stillwater shots that I finished I found that I need to change the colors from what ever the light temperature was, in this case the snow was yellow and the lights started to jump of the visible light scale. I also learned to bring sets of different colored filters to accommodate the over powering temps of the street lights. Once I drop the yellow out of the snow, the picture has a feeling that leaves the viewer trapped in the photograph.
I learned quite a bit from the shoot. It has given me insight on how I conduct my night shooting. The big thing is to understand or anticipate in your head what your end result will look like, remember settings out loud, and expect that the photograph will come out different than expected. Then when you do, make sure that you identify what you thought was going to come out of the settings and also identify the changes within the pictures that came out of the same settings.
This is mainly directed at film when you are shooting blind, but I also believe that it can pertain to digital as well. If you are on a time constraint or just don’t feel like analyzing every shot, you can view your photographs right when you get to a computer.
Look at your photographs, analyze them, and then identify what you may be able to do to change your settings in the future. The more you understand your shooting style, techniques, and the ability to control it, the sooner you will be shooting for fun rather than spending most of the time with the technical aspects of your camera.
Starting off with some Stillwater Minnesota Pictures....

" The coldest hour of nightfall " Series Print #1 - sk2004
____________

" The coldest hour of nightfall " Series Print #5 - sk2004
_____________

" The coldest hour of nightfall " Series Print # 8 - sk 2004
_________________

" The Snowman" Series Print # 2 - sk2004
_______________
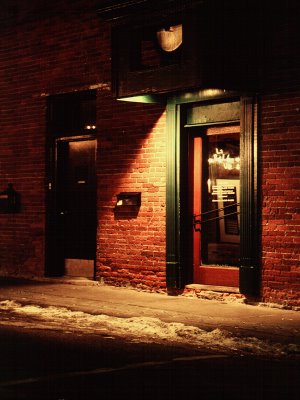
"The Door" - sk2004
______________
Ok....let's get out of Stillwater, Minnesota....move on to some other photographs!
_______________
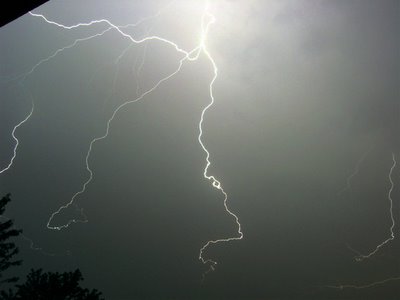
Lightning Strikes - sk2003
_____________

"Pumpkin Grin" - sk2002
________________
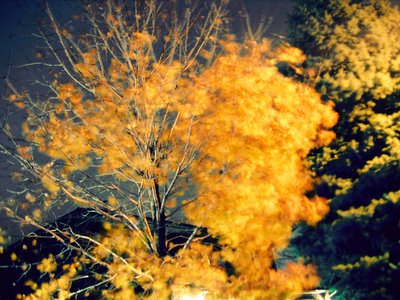
"Burning Passion" Series Alt - sk2005
__________________

"Burning Passion" Series Alt #2 - sk2005
__________________________

"Woods of Twilight" - sk2002
_______________

"The Hen" - sk2001
No comments:
Post a Comment